

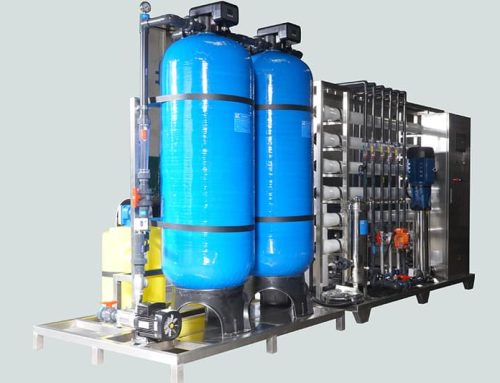
Reverse osmosis (RO) water treatment technology, as an efficient water purification solution, has been widely applied worldwide, covering multiple fields from household drinking water purification to industrial boiler water supply treatment. The correct installation method is the key to ensuring the long-term stable operation of the reverse osmosis system and producing high-quality water quality. This article will systematically introduce the complete installation process of reverse osmosis systems, including pre preparation, equipment assembly, pipeline connection, electrical configuration, system debugging, and daily maintenance, providing detailed guidance for technical personnel and users engaged in water treatment equipment installation.
What preparations need to be made before installing a reverse osmosis system?
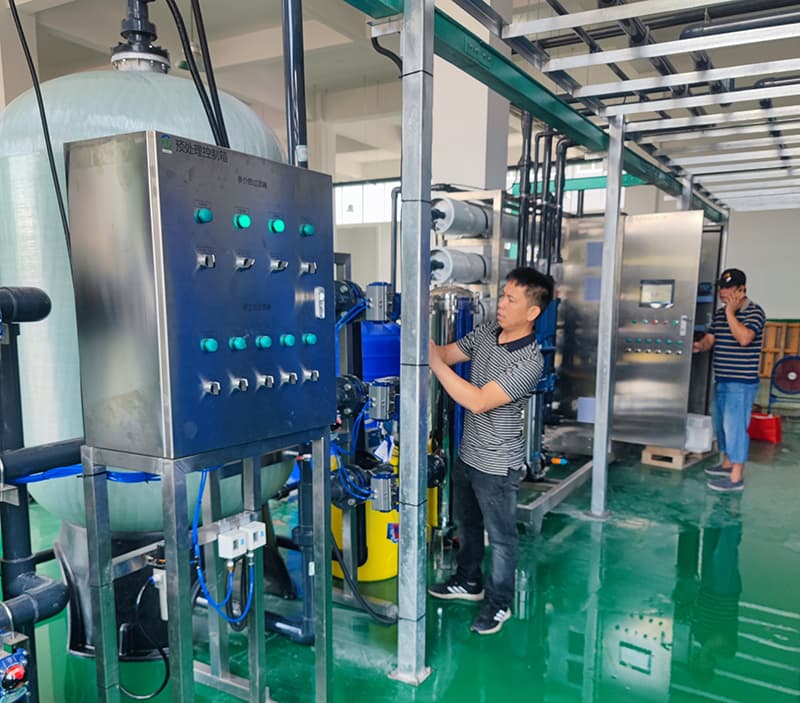
Site assessment and planning are the primary steps in installing a reverse osmosis system. A suitable installation site should have good ventilation conditions, and the ambient temperature should be maintained between 5-38 ℃. When the temperature exceeds 35 ℃, ventilation measures should be strengthened. At the same time, the installation location should be close to the water source and drainage outlet, and there should be sufficient space for daily maintenance and repair. The site also needs to provide a stable support structure to ensure that the equipment will not shift due to vibration during operation.
The preparation of tools and materials is the foundation for ensuring smooth installation. The tools that need to be prepared include wrenches, screwdrivers, pliers, torque wrenches, level gauges, etc. The necessary materials include pipeline connectors, sealant, pressure gauges, measuring instruments, etc. It is particularly important to note that the installation of reverse osmosis membranes requires specialized water-soluble lubricants (such as chemically pure glycerol), and petroleum based lubricants should not be used to avoid damage to membrane components.
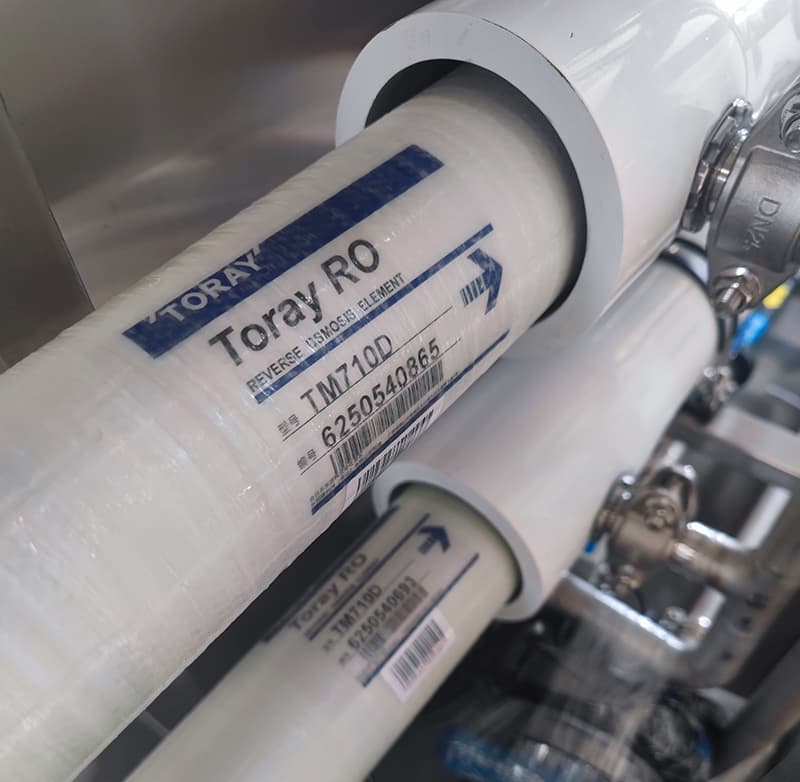
The equipment inspection and acceptance process cannot be ignored. After the equipment arrives at the site, it should be installed within one month and immediately undergo a water test run. Before installation, it is necessary to check whether the equipment and accessories are complete and intact, and confirm that the model of the membrane element matches the design requirements. At the same time, the pre-treatment system (such as multi-media filters, activated carbon filters, etc.) should be inspected to ensure its normal operation and that the effluent quality meets the inlet standards of the RO membrane (SDI ≤ 5, residual chlorine<0.1ppm, turbidity<1NTU).
Preparation checklist for installation of reverse osmosis system
| Preparation category | Specific project | Precautions |
|---|---|---|
| Site preparation | Installation location selection | Near water source and drainage outlet, ambient temperature 5-38 ℃ |
| Space planning | Leave sufficient space for operation and maintenance, with stable support | |
| Tool preparation | Basic tools | Wrenches, screwdrivers, pliers, level gauges, etc |
| Special tools | Torque wrenches, PVC pipe cutters, pressure gauges, etc | |
| Material preparation | Connection materials | Pipes, joints, sealants, raw tape, etc |
| Special material | Water soluble lubricant (glycerin) | |
| Equipment inspection | Component integrity | Check whether pressure vessels, membrane components, sealing rings, etc. are complete |
| Specification compliance | Confirm that the film model matches the design and that the packaging is intact |
How to install reverse osmosis membrane?
Pre treatment of pressure vessels is the foundation for the installation of membrane components.
Before installing membrane components, the interior of the pressure vessel must be thoroughly cleaned, rinsed with clean water or neutral detergent to remove debris and grease. At the same time, it is necessary to check whether there are any scratches or damages inside the pressure vessel, and containers with leaks must be replaced. After cleaning, lubricate the inner wall of the tube shell with about 50% glycerol water mixture to facilitate the smooth installation of the membrane element.
The determination of the installation direction of membrane components is crucial.
The end of the membrane element with a saltwater sealing ring should face the water inlet (usually marked with “Feed” or indicated by an arrow). When installing, it is important to note that the opening direction of the saltwater seal ring must face the water inlet direction. If installed in the opposite direction, it cannot function properly. Glycerol or specialized lubricant should be evenly applied to the O-rings at both ends of the membrane element to reduce frictional resistance during insertion.
The installation of membrane components requires meticulous patience.
When removing membrane components from plastic packaging bags, they should be operated in a well ventilated environment, wearing protective goggles and gloves. When unpacking, pay attention to the protective liquid in the membrane element and be careful during operation. Insert the end of the membrane element without a saltwater sealing ring parallel to the inlet end of the pressure vessel, slowly pushing in 2/3 of the element, being careful not to touch the edge of the pressure vessel. When installing multiple membrane components in series, after the first membrane component is installed, a connector is installed at its end, and then subsequent membrane components are installed in sequence to ensure alignment of the center tubes of adjacent membrane components.
Sealing inspection is the key to ensuring the normal operation of the system.
After the installation of all membrane components is completed, the O-ring should be checked for proper positioning to ensure that the sealing ring is not missing, deformed, or aged. When installing the end plate, it is necessary to prevent axial movement of components and impact between components during system startup and shutdown. The gap between the membrane components and the end plate can be adjusted using an adjusting plate. Finally, connect all external pipelines and prepare for the system’s water testing.
What are the technical specifications for pipeline connection and electrical configuration?
The selection of pipeline material directly affects the operation effect of the system.
The connecting pipeline of the reverse osmosis pure water device should be made of plastic water supply pipes, while the material of the drainage pipe cannot be soft plastic pipes, because soft plastic pipes are prone to deformation, which will affect the drainage effect. During the pipeline connection process, the number of bends should be minimized as much as possible, and the fewer bends, the better. The connection length of the drainage pipe should generally be less than 6 meters. At the same time, the water pipeline needs to have good sealing to avoid affecting the regeneration effect of the pure water device.
The key points of pipeline connection technology need to be strictly followed.
When installing the inlet and outlet pipes, not only manual valves and bypass valves should be installed, but also pressure gauges should be installed. It is particularly important to note that a sampling valve needs to be installed before the outlet pipe valve for daily water quality testing. To avoid blockage of the valve body by pollutants in the pipeline, a Y-shaped filter needs to be installed after the inlet valve to filter the incoming water quality. When connecting the inlet and outlet pipes to the reverse osmosis system, ensure that the pipes are firmly connected and there are no leaks.
Electrical connection safety measures are the guarantee for the stable operation of the system.
Before wiring, be sure to cut off the main power supply to ensure safe operation. According to the power supply type (single-phase or three-phase), connect the wires according to the markings in the operation manual. When connecting the power line of the high-pressure pump, it is necessary to check whether the direction of rotation of the high-pressure pump is correct, ensure that the electrical wiring is correct, and maintain good grounding. The system should be equipped with necessary electrical protection devices, such as low-voltage protection switches. When the inlet pressure of the high-pressure pump is insufficient (less than 1kg/cm ²), the device can automatically stop the high-pressure pump.
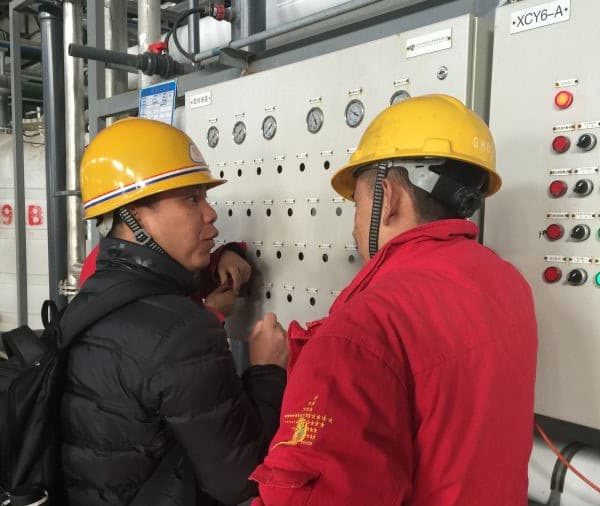
Installation of instrumentation and control system Improve system functionality.
It is necessary to install pressure gauges at the inlet, outlet, and concentrate outlet, and calibrate monitoring equipment such as conductivity meters and flow meters. If the system is equipped with a controller, it is necessary to connect the inlet and outlet pipes according to the corresponding water inlet and outlet arrow markings. For flow type regeneration controllers, they must be installed at the inlet. After completing the electrical connection, control parameters should be configured and calibrated to meet application requirements.
What are the key steps to pay attention to during system debugging and initial operation?
Low pressure flushing and exhaust operation is the first step in system debugging.
Before starting the high-pressure pump, the concentrated water discharge valve should be opened and flushed at a low pressure of 0.2-0.3MPa for 30 minutes to remove the protective solution (sodium bisulfite) on the membrane surface. Use low-pressure, low flow qualified pre treated effluent to drive away the air inside the membrane element and pressure vessel. All produced and concentrated water during the process should be discharged into the sewer. For dry film systems, continuous low-pressure flushing should be carried out for more than 6 hours, or flushing should be carried out for 1-2 hours first, soaking overnight, and then rinsing for about 1 hour.
System startup and parameter adjustment need to be done gradually.
When starting the high-pressure pump for the first time, the inlet control valve between the high-pressure pump and the membrane element should be in a nearly fully closed state to prevent the impact of water flow and pressure on the membrane element. After starting the high-pressure pump, the inlet control valve of the high-pressure pump outlet should be slowly opened, and the concentrated water flow rate should be uniformly increased to the design value. The pressure rise rate should be less than 0.07 MPa per second. Slowly open the inlet control valve of the high-pressure pump outlet while slowly closing the concentrated water control valve to maintain the specified concentrated water discharge flow rate in the system design. At the same time, observe the system’s water production flow rate and gradually adjust it to achieve the design value of the recovery rate.
Water quality testing and performance evaluation are key to confirming the normal operation of the system. After running for 1 hour, record the water production and desalination rate (calculated by conductivity), and the deviation from the design value should be less than ± 10%. Check whether the dosage of all chemical agents is consistent with the design value, and measure the pH value of the incoming water. After the system runs continuously for 1 hour, when the produced water is qualified, first open the qualified water delivery valve and then close the water discharge valve to supply water to the subsequent equipment. It is recommended to closely monitor the system performance within 24-48 hours of initial operation, including parameters such as inlet pressure, pressure difference, temperature, flow rate, recovery rate, and conductivity.
The automatic running switch is the final stage of system debugging. The initial debugging of reverse osmosis devices is usually done manually in single steps. After normal operation, they can be switched to automatic mode, which is automatically controlled by online instruments and PLC. Before switching to automatic operation, it is necessary to set sampling points for each link of the system, and correctly set interlocking, delay, and alarm devices. Record all operating parameters and switch the system to automatic operation mode after stabilization.
What are the maintenance after the installation of reverse osmosis system?
Daily monitoring and recording are the foundation of maintenance work.
Conduct at least 2 inspections and records of the operation status of the equipment every day, and test key indicators such as hardness, residual chlorine, and conductivity. Every month, bacteria and endotoxins need to be tested to ensure that the water quality is qualified. Parameters such as pressure, flow rate, and conductivity should be regularly recorded to facilitate the analysis of performance degradation trends. Through these data, abnormal situations in system operation can be detected in a timely manner and corresponding measures can be taken.
Regular cleaning and disinfection are key to maintaining system performance.
Chemical cleaning should be carried out every 3 to 6 months, using citric acid or EDTA solution. If the pollutants are severe, the cleaning cycle should be shortened. The equipment needs to be disinfected regularly, and disinfection is required when microbial testing exceeds the intervention value. The cleaning system includes a cleaning water tank, a cleaning water pump, and a precision filter. When the system is contaminated, it is necessary to clean the reverse osmosis to restore its effectiveness.
Consumables replacement and component inspection need to be carried out according to the plan.
The PP cotton filter element should be replaced every 3 months, and the reverse osmosis membrane should be replaced every 2-3 years. If the water production decreases by more than 30% or the product water conductivity exceeds 10 μ s/cm, the reverse osmosis membrane also needs to be replaced. The pre filter element needs to be replaced every 1-3 months, and the sealing ring needs to be checked for aging every year. Regularly inspect the internal condition of pressure vessels, check for any defects on the surface of membrane components, and promptly address any issues.
Professional training is crucial for the long-term stable operation of the system. Operations management personnel must be familiar with the operational requirements and technical indicators of water treatment processes and equipment. Operators must undergo technical training and production practice, understand the processing technology, be familiar with the operating requirements and technical indicators of the facilities and equipment in their position, and pass the assessment before they can take up their posts. Untrained non professionals are not allowed to operate the equipment without authorization to avoid unnecessary damage.
What are the common faults in installing reverse osmosis systems and how to solve them?
Abnormal water quality is one of the common problems. If the conductivity of the produced water is too high, it may be due to incorrect installation direction of the membrane element or leakage of the O-ring. The solution is to remove the membrane element from the pressure vessel, reinstall it correctly, and ensure that the sealing ring is intact and undamaged. If it is a newly installed system, it may be due to the protective liquid inside the membrane components not being thoroughly flushed, and the flushing time should be extended. In addition, it is necessary to check whether the pre-treatment system is working properly and whether the inlet water quality meets the requirements.
Abnormal pressure and flow may be caused by multiple factors. Abnormal increase in inlet pressure is usually caused by insufficient pretreatment leading to membrane fouling or pipeline blockage. At this point, it is necessary to check the pre filter and perform chemical cleaning on the membrane components if necessary. A significant decrease in water production may be due to low temperature (2-3% reduction in water production for every 1 ℃ decrease) or excessive pressure on the membrane. The solution includes adding a water inlet heating device or adjusting the operating pressure.
System leaks and mechanical failures need to be promptly addressed. If a leak is found at the pipeline connection, the sealing components should be checked for integrity and the connection should be tightened. Abnormal noise or vibration of the high-pressure pump may be caused by cavitation or mechanical failure. It is necessary to check whether the inlet pressure is sufficient and whether the pump direction is correct. If the system frequently starts and stops, it may be a fault in the pressure control system, and the settings of the low-pressure protection switch and high-pressure switch need to be checked.
Membrane performance degradation is a common phenomenon in long-term operation. Reverse osmosis membranes may gradually decline in performance during use due to chemical substances, microbial contamination, or mechanical damage. The transition from initial performance to stable state of newly put into use reverse osmosis membrane components takes a certain amount of time, approximately one week. Under normal use, the lifespan of reverse osmosis membranes is usually 2-3 years, but may vary depending on the inlet water quality and operating conditions. Regular chemical cleaning and good pretreatment can extend the service life of the membrane.
By following the detailed installation and maintenance guidelines above, the reverse osmosis system can operate stably for 3-5 years, effectively ensuring desalination rate and water production efficiency. The correct installation technology and standardized maintenance process are key to ensuring the long-term stable operation of the reverse osmosis water treatment system. For any uncertain operation, it is recommended to contact professional technicians for handling to avoid secondary damage caused by self disassembly.
Get The Solution Today!